How to Properly Adjust and Customize My Bar Stool for Maximum Utility
Jan 20, 2025
Daily Cleaning Methods for Bar Stools

Using a Soft, Damp Cloth
Under routine cleaning protocols for bar stools, initiating the process with the simplest method is paramount. A soft, damp cloth is frequently all that's required to eliminate dust, spills, and minor stains from the surface of your bar stool. It's essential to ensure the cloth is not excessively wet to prevent soaking the upholstery or wooden components, which could result in warping or mold growth. Gently wipe down the seat, backrest (if present), and legs, giving extra attention to areas commonly touched by hands or exposed to drinks.

Spot Cleaning with Mild Detergent
On occasions, spot cleaning may be necessary to address stubborn stains. Combine a mild, water-based detergent with warm water in a spray bottle. Before applying this solution to the entire area, test it on an inconspicuous section to confirm it won't harm the fabric or finish. Directly apply the solution to the stain, then gently blot with a pristine white cloth (avoid rubbing), and let the area dry thoroughly in the air.
Vacuuming for Fabric Upholstery
For bar stools adorned with fabric upholstery, regular vacuuming is indispensable. Utilize the upholstery attachment on your vacuum cleaner to delicately suction away embedded dirt and debris. This practice prevents the accumulation of grime that can cause staining and gradual wear over time. Pay meticulous attention to seams and creases where dirt tends to accumulate.

Wood Care with Polish or Oil
If your bar stool boasts a wooden frame or legs, preserving its inherent beauty necessitates periodic polishing or oiling. Opt for a product tailored to the specific type of wood and adhere to the manufacturer's guidelines. Apply a thin, consistent layer, working the product into the grain using a soft cloth. Finish by buffing off any excess with a clean cloth to attain a sleek, lustrous finish.
Maintenance Guide for Bar Stool
Regular Cleaning
To maintain the appearance and integrity of your bar stools, regular cleaning is essential. Use a soft, damp cloth to wipe down surfaces weekly, avoiding abrasive cleaners that could scratch or dull finishes. For fabric upholstery, vacuum regularly and spot clean with a mild detergent and cool water, always blotting rather than scrubbing to prevent damage.
Polishing and Waxing
Every 3-6 months, apply a high-quality furniture polish or wax to wood or laminate surfaces to protect against moisture and scratches. For metal frames, use a metal polish suited to the specific metal type to restore shine and prevent tarnishing. Follow the manufacturer's instructions for best results.
Inspecting for Wear and Tear
Monthly inspections are crucial for identifying and addressing potential issues early. Check leg stability, upholstery integrity, and hardware tightness. Replace worn parts promptly to prevent accidents and further damage. Ensure that screws, nuts, and bolts are secure to maintain structural integrity.
Adjusting Height Mechanisms
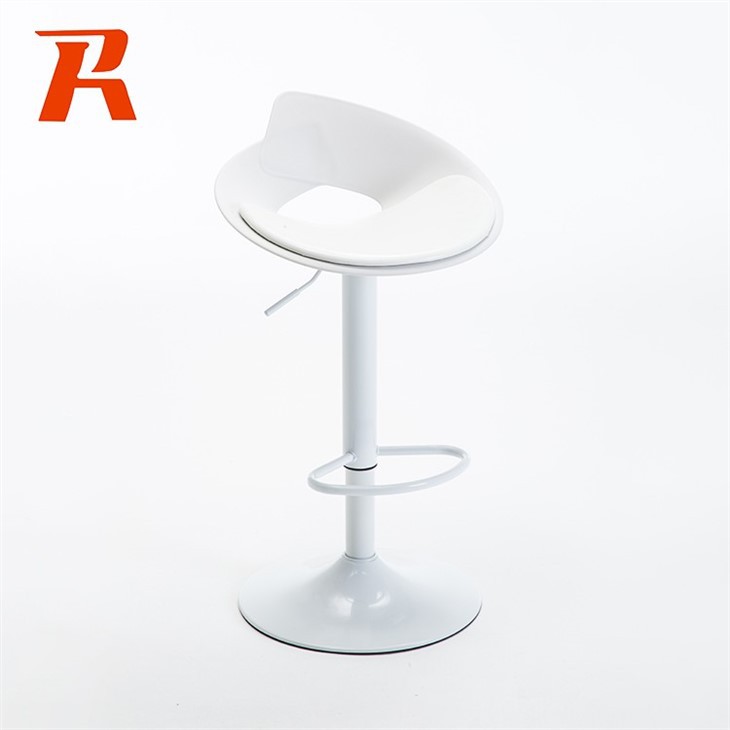
Regularly test the functionality of gas lift or mechanical lock height adjustment mechanisms. Smooth operation without resistance or leakage indicates proper function. Consult the manufacturer for repair or replacement if issues arise to maintain stability and ease of use.
Preventive Measures
Ongoing preventive measures include placing bar stools away from direct sunlight and heat sources, adhering to weight limits, and using felt pads or glides to protect floors. Proper use, such as avoiding excessive leaning or rocking, also helps to preserve the stool's structure and joints.
Installation Guide For Bar Stools

Unpacking and Inspecting Parts
Before beginning the installation process, it's crucial to ensure you have all the necessary parts and tools listed in the manufacturer's instructions. Carefully unpack the bar stool, taking the time to inspect each piece for any signs of damage that may have occurred during shipping. This includes checking for scratches, dents, or cracks in the frame, seat, and backrest. Set aside any hardware, screws, or tools needed for assembly in a designated area to keep them organized and easily accessible.
Assembling the Base and Legs
Most bar stools come with detachable legs or a base that requires some level of assembly. Follow the instructions closely, paying attention to any diagrams or illustrations provided. Attach the legs securely to the base, ensuring they are evenly spaced and tightly fastened to prevent wobbling. Use the appropriate tools, such as a screwdriver or wrench, to avoid stripping the screws, which could compromise the stool's stability.
Attaching the Seat and Backrest
Once the base and legs are assembled, it's time to move on to attaching the seat and, if applicable, the backrest. Carefully line up the mounting holes on the seat and backrest with those on the base or legs. Use the provided screws to secure them in place, torquing them just enough to avoid stripping the threads. Take your time with this step to ensure a secure and stable connection.
Final Adjustments and Testing
After assembly, give the bar stool a thorough inspection to ensure all parts are securely fastened and there are no loose or missing components. Sit on the stool to test its stability, checking for any wobbling or loose parts that may need further tightening. Adjust the height, if possible, to your desired level for optimal comfort and ergonomics. Additionally, rock the stool gently side to side and front to back to ensure it remains stable under various conditions. With these final adjustments and tests, you can enjoy your new bar stool with confidence.

DIY Repair Tips for Minor Damage on Gaming Chairs
Fixing Tears in Fabric Upholstery
Small tears in fabric gaming chair upholstery can often be repaired with a fabric patch kit, restoring the chair to its original appearance and functionality. Begin by cleaning the area around the tear using a mild detergent and a damp cloth to ensure a clean surface for the patch. Cut a patch from the fabric patch kit that is slightly larger than the damaged area to ensure complete coverage. Apply fabric glue to the back of the patch and press it firmly in place, or sew it in using a matching thread for a more permanent fix. For a more seamless look, consider using a fabric marker to touch up any exposed areas around the patch to blend it with the surrounding fabric.
Replacing Broken Casters
When casters on a gaming chair break, they can usually be replaced individually, allowing you to maintain the chair's mobility without having to purchase a whole new set. Begin by removing the old caster by unscrewing it from the base of the chair using a screwdriver. Purchase a replacement caster that matches the existing ones in size, style, and wheel material to ensure a seamless fit and function. Attach the new caster using the same screws, ensuring they are tightened securely. Test the new caster by rotating it smoothly to make sure it moves freely and supports the chair's weight evenly.
Fixing Loose Recline Mechanisms
A loose recline mechanism on a gaming chair can significantly affect its comfort and functionality. To tighten it, you'll need to access the internal components, which may involve removing part of the upholstery. Depending on the chair's design, this may require unscrewing screws or using a seam ripper to carefully detach the fabric. Once the internal components are exposed, use a wrench or screwdriver to tighten any loose bolts or screws. Be careful not to overtighten, as this could strip the threads or damage the mechanism. Reassemble the chair carefully, ensuring all parts are securely in place and the upholstery is properly reattached.
Restoring Leather Cracks
Minor cracks in leather gaming chairs can detract from their appearance and reduce their lifespan. To treat these cracks, use a leather filler specifically designed for this purpose. Begin by cleaning the affected area with a leather cleaner and soft cloth to remove any dirt or debris. Apply the leather filler according to the product instructions, using a spatula or your finger to smooth it out and fill in the cracks. Allow the filler to dry completely, following the manufacturer's recommended drying time. Once dry, buff the area with a soft cloth to blend the filler with the surrounding leather and restore a smooth, uniform appearance.